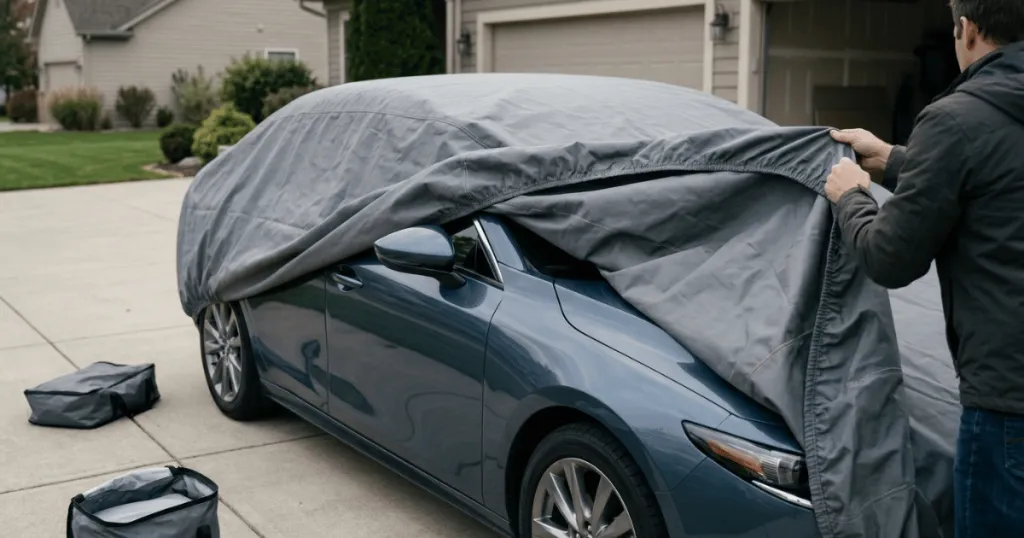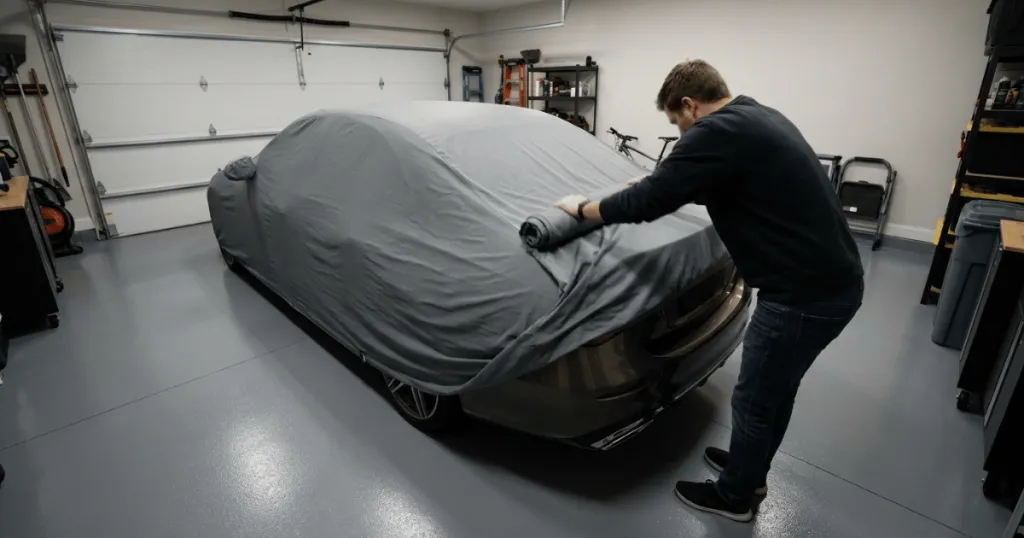
Many vehicle owners assume that putting on a protective car cover requires a second pair of hands. Wrestling a large sheet of fabric over a tall SUV or a low-slung sports car often looks like a two-person job at first glance. However, mastering one person car cover installation is entirely achievable with the right physical technique and a methodical approach to handling the fabric.
Instead of stretching the entire cover over the vehicle all at once, solo methods rely on folding, rolling, and controlled placement. Understanding how to manage the bulk of the material prevents frustration, protects your vehicle paint from accidental scratches, and ensures the cover seats correctly every single time.
Adopting a reliable solo routine transforms what feels like an awkward wrestling match into a predictable daily habit. By respecting the physics of wind resistance and material weight, you can safeguard your vehicle against environmental exposure without waiting for someone to help you align the hems.
The Core Mechanics of One Person Car Cover Installation
Achieving a smooth solo setup comes down to reducing friction and controlling the fabric weight. When you attempt to lift a bulky cover over both mirrors and the roof simultaneously, the wind catches the material and pulls it out of alignment. Successful solo installation requires breaking the process down into predictable physical steps that keep the fabric close to the body of the vehicle.
Most modern covers feature mirror pockets and elasticized hems that act as natural anchoring points. If you start by securing these key landmarks, the rest of the fabric falls into place naturally. From a practical standpoint, patience during the initial unrolling phase saves you from having to readjust the entire cover once it is draped over the hood and trunk.
Understanding the tension dynamics of your specific protective textile is equally vital. Heavy multi-layer materials hold their shape better against moderate breezes, but they require careful lifting to avoid catching sharp body trim. Conversely, lightweight fabrics are easy to maneuver, yet they demand immediate anchoring so they do not drift off target before you can pull the bottom hem down over the rocker panels.
Step 1: The Accordion Fold Technique
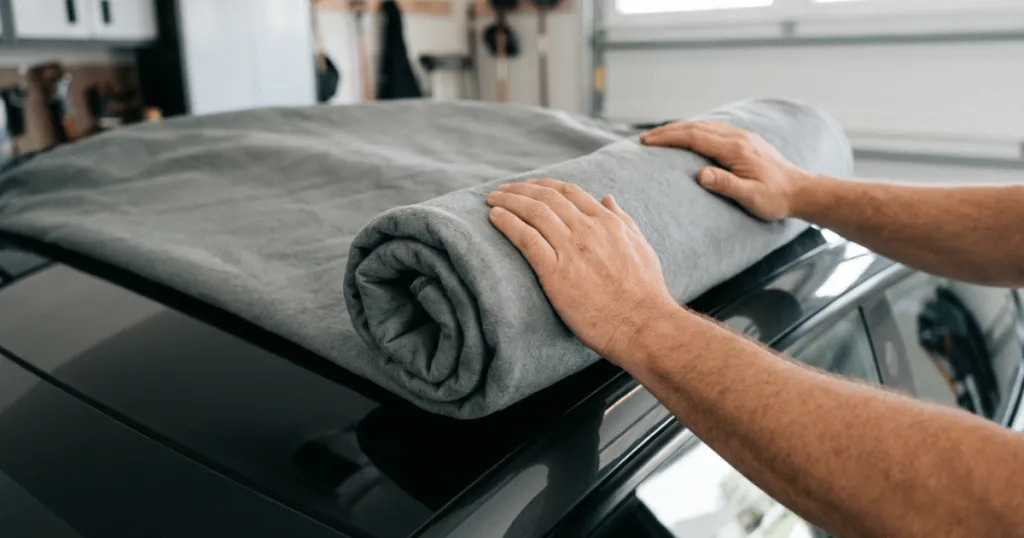
Proper storage directly dictates how easily you can pull off a one person car cover installation. When removing the cover from your vehicle, fold the sides inward toward the center seam, then gather the material in an accordion fold from front to back. This creates a neat bundle that sits easily on the roof or hood without tangling.
Placing this folded bundle onto the center of the roof allows you to unroll the front toward the grille and the rear toward the bumper. Never pull the fabric across the hood or roof while it is bunched up on the ground, as trapped dirt underneath can act like sandpaper on your clear coat.
Consistency in your car cover folding technique guarantees that the inner lining stays pristine. If the lining touches the pavement during removal, shake it out vigorously or lay it flat on a clean surface before reloading it into your trunk or storage bag. Keeping grit away from the underside is the single most effective way to prevent fine swirls on sensitive automotive finishes.
Step 2: Securing the Anchor Points
Begin by locating the designated mirror pockets if your cover is custom-fit. Slip the driver side pocket over the mirror first, then walk around to hook the passenger side. This anchors the middle section of the cover and prevents it from sliding sideways while you work on the front and rear bumpers.
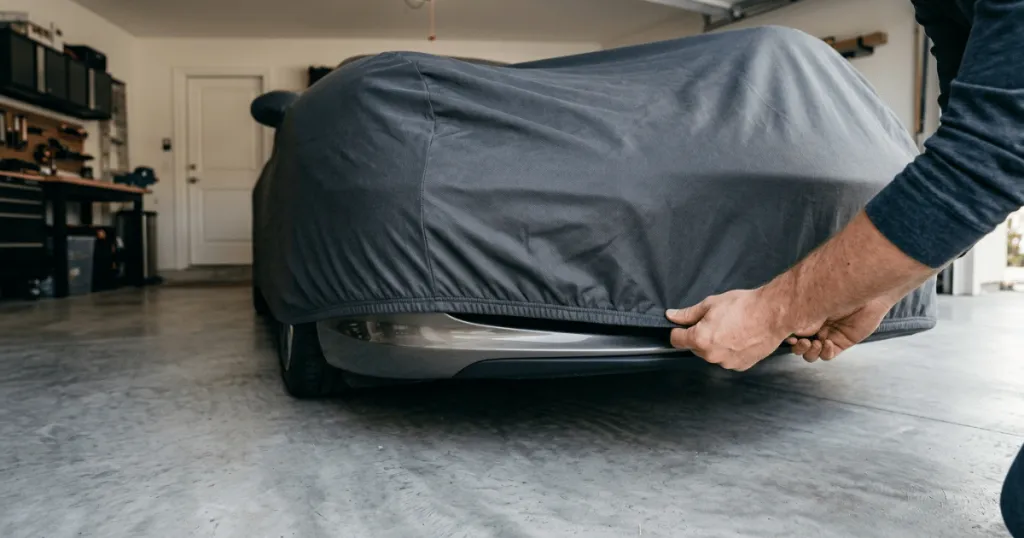
If you are using a universal cover without mirror pockets, line up the front hem with the bottom of the front bumper. Hook the elastic under the bumper lip and hold it in place with one hand while you unroll the rest of the material toward the rear. This initial tension is what makes solo installation manageable in breezy outdoor conditions.
Establishing these grounding points early eliminates the need to constantly stretch and pull the fabric from opposite sides of the vehicle. Once the front or middle is fastened, you can walk methodically around the perimeter, easing the elastic hem over each wheel arch and bumper corner without fighting the tension of the entire cover at once.
Step 3: Managing Wind and Tension
Wind is the primary obstacle during any one person car cover installation. A sudden gust can lift the loose fabric like a parachute and pull it entirely off the vehicle. To counter this, work close to the body panels and tuck the elastic hem under the front and rear bumpers before pulling the sides down over the doors.
If you live in a particularly windy climate, consider attaching the middle underbody strap early in the process. Snapping this strap underneath the chassis anchors the cover firmly, allowing you to adjust the remaining panels without fighting the elements.
When outdoor air currents threaten to disrupt your vehicle cover placement, avoid fighting the wind directly. Instead, pause your unrolling, press the fabric flat against a stable hood or trunk surface to vent trapped air, and resume your systematic deployment once the gust subsides.
Real-World Context and Vehicle Variations
The physical effort required for a solo setup varies significantly depending on your vehicle type and garage layout. Putting a cover on a compact sedan is vastly different from managing a full-size pickup truck or a tall utility vehicle. Recognizing these structural differences helps you adapt your physical movements to match the dimensions of your specific car.
For instance, a low-profile sports car requires you to bend down repeatedly to hook the lower hems, while a tall SUV demands careful attention to roof reach. Using a lightweight multi-layer fabric makes a noticeable difference when lifting material above your shoulders. Heavy canvas covers provide exceptional weather defense, but their sheer weight makes solo handling much more demanding.
Spatial constraints inside a tight garage also shape your workflow. If your vehicle is parked close to a storage wall or workbench, you may need to adjust which side you unroll from first to avoid jamming the fabric against structural obstacles.
Compact Sedans and Coupes
Smaller vehicles offer the easiest environment for solo users. Because the roofline is low and the overall surface area is modest, you can easily reach across the entire width of the car from either side.
For sedans, placing the folded cover on the trunk and unrolling it forward toward the hood is usually the fastest method. You can complete the installation in under two minutes once you establish a consistent folding routine after each use.
Coupes with raked windshields present unique contour challenges, but their shorter overall length means you can easily correct alignment mistakes by hand without walking back and forth across the vehicle multiple times.
Large SUVs and Crossovers
Taller vehicles introduce a vertical reach challenge that tests your patience. Without a step stool or a clever folding strategy, getting the fabric over a high roofline becomes an awkward stretch.
When handling larger vehicles, keep the accordion-folded bundle right on top of the roof rack or central roof panel. Unroll the front half down the windshield and hood first, then walk to the rear to unroll the second half down the tailgate. This prevents the heavy fabric from dragging across your side windows.
Owners of full-size pickup trucks face a similar logistical puzzle due to extended cab lengths and high beds. Utilizing a cover with clearly marked front and rear tags eliminates guesswork, ensuring you never waste energy trying to reverse a long cover halfway through the process.
Why Proper Solo Technique Matters for Vehicle Protection
Taking shortcuts during installation often leads to surface damage that defeats the purpose of using a cover in the first place. When someone tries to drag a heavy cover across a dusty vehicle, trapped abrasive particles create micro-scratches in the clear coat. A clean, controlled solo method ensures the fabric glides over the paint rather than grinding across it.
Furthermore, incorrect installation frequently leaves slack in the material. Loose fabric flaps aggressively in the wind, creating friction points that wear down paint on high spots like spoilers, mirror housings, and fender edges. Securing the cover tightly and evenly preserves both the finish of your vehicle and the structural integrity of the cover itself.
From an operational standpoint, developing a smooth routine encourages consistent daily use. If putting on the cover feels like an exhausting wrestling match, you are far more likely to leave your vehicle exposed to UV rays, tree sap, and bird droppings. A streamlined solo workflow removes the friction from vehicle protection.
Preserving clear coat protection over years of outdoor parking relies entirely on treating the installation phase as a deliberate preservation step rather than a hurried chore. Taking an extra thirty seconds to align hems properly prevents premature wear on vulnerable painted edges.
Common Misconceptions About Solo Cover Setup
Many vehicle owners harbor false assumptions about what is required to protect their cars effectively. Clearing up these misunderstandings saves time and prevents unnecessary frustration during daily maintenance routines.
Myth: Custom Covers Are Too Complex for One Person
A common belief suggests that custom-fit covers with mirror pockets and antenna patches require two people to align properly. In reality, custom covers are actually easier for solo users because every contour has a specific home. Once you hook the mirror pockets, the cover self-aligns across the body panels.
Myth: You Must Pull the Cover Across the Ground
Some owners drag the entire cover from the front bumper to the rear while it touches the pavement. This guarantees that dirt and grit will stick to the interior lining. Proper folding techniques keep the inner lining completely off the ground throughout the entire installation cycle.
Myth: Wind Makes Solo Installation Impossible
While wind complicates the process, it does not prevent a successful solo installation if you use the right sequence. Anchoring the front bumper or clipping the center underbody strap first stabilizes the entire assembly, rendering moderate breezes manageable.
Mastering one person car cover installation transforms a tedious chore into a quick, predictable part of your vehicle maintenance routine. By focusing on proper folding habits, anchoring key points first, and adapting your movements to your vehicle’s size, you can protect your car efficiently without ever needing a second pair of hands.
FAQ
How do I prevent my car cover from scratching the paint during solo installation?
Always ensure your vehicle is clean before putting the cover on, and store the cover using an accordion fold so the interior lining never touches the ground. During one person car cover installation, lift the fabric rather than dragging it across dirty body panels.
What is the easiest way to put a car cover on a tall SUV by yourself?
Place the folded cover bundle on top of the roof, unroll the front half toward the hood, and then unroll the rear half toward the tailgate. Using a lightweight fabric material also makes reaching high rooflines much easier for a single person.
How can I keep the cover from blowing away in the wind while I install it?
Hook the front elastic hem under the front bumper first to anchor the cover. For optimal stability during a breezy one person car cover installation, fasten the middle underbody strap early in the process to lock the fabric in place.